Screen Printing Technique
If you have screen printed before, probably way back at school, you will remember the old days where you grabbed the squeegee with both hands and pressed as hard as you could to make a print - well times have certainly changed as that same technique using modern equipment will actually provide a very poor quality print.
EZIscreen equipment using professional squeegees and professional inks have changed two basic elements of traditional screen printing:
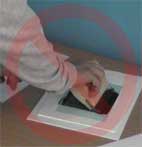 |
1. The angle of the squeegee is held upright at about 60-70 degreesThis provides a clear, sharp print - angles too low force too much ink through the screen and bleeding may occur |
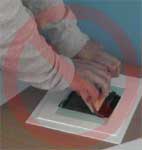 |
2. Less pressure is used with the squeegee when printingThe blade on the squeegee should NOT flex or bend whilst printing. |
It's NOT the pressure applied to the squeegee that pushes the ink through the screen and onto the item below, it's actually the sharp edge of the squeegee blade that pulls a fine layer of ink through the screen mesh, which is designed to regulate the amount of ink that passes. So excess pressure just blurs your design and reduces quality.
If you have never screen printed before then you will normally receive a better print than a person who has using old techniques, as they must remove old habits of excessive pressure which was required using the outdated equipment and inks.
You must use pressure on the squeegee to keep even pressure along that blade so one side does not print more than the other, however you can screen print with 2 fingers holding the squeegee blade - let the squeegee & ink do the work for you.
Basic Screen Printing Technique
1. With your screen imaged and mounted to a frame, place the screen over some paper ready for a test print
Always perform a test print before using each screen - this will reveal any pinholes or problems with artwork/ imaging which can be corrected before printing commences
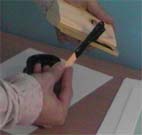 2. Dip an ink knife (wooden or plastic) into the ink and laden the squeegee blade with the ink ready to commence printing
Laden by placing the ink knife against the blade and holding the squeegee still, pull the ink knife downwards - the blade of the squeegee will 'scrape' the ink off the ink knife
You can also put the ink directly onto the screen
 3. With sufficient ink on the blade, about 7-10mm thick, place the squeegee onto the edge of the screen, then lower the blade and rock forward & back 3 times to transfer this ink onto the screen and then bring the angle back up ready to print.
Rocking to transfer the ink is ONLY required on the 1st print - this is NOT required for every print.
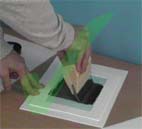
4. Pull the squeegee across the screen at an angle of approx. 70 degrees from one side to the other.
When complete raise the squeegee angle back to vertical to 'pickup' the ink and remove from 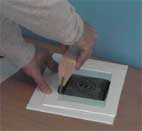 the squeegee from the screen
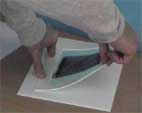 5. Rest the squeegee on some paper beside the screen and lift the frame in a hinge motion to reveal the print
A hinge motion is used to avoid smudging/ blurring the print [hold the frame on one side]
If the print is too light you can lower the frame and print again as the hinge effect holds it in place
Points to Note
Your squeegee should be at approx. 70 degrees and move freely across the screen, not skip or stop
If too much ink is flowing off the outside edges and the print is blurred or heavy, then you are pressing too hard
Once you commence printing you will quickly determine the correct level of pressure and squeegee angle that suits - the prints will tell you what you are doing wrong
Prints too dark, blurred, smudged or not a clear image = pressure too great and squeegee angle too low
Prints too light, not a clear image = pressure too light, squeegee angle too high or not enough ink on the squeegee
Heat Setting Fabric Inks
Fabric screen printing ink requires heat setting in order to cure/set the ink to the fabric. For details on how to heat set click here . .

